
API Management in DELL BOOMI
Over View:-
- Setting up an API Component
- How to configure API Component
- How to set up Web service server
- How to deploy API Component
- How to Test API’s In Boomi
In this document, we are going to perform basic process to combine two words. We are sending first name and last name as input. We will receive full name as output (combination of first name and last name).
Step 1: –
Create an empty process from the Welcome Tab and select Connector type of “Web Services Server”.

Step 2:-
Click the Operations’ “+”to create a new operation.

Step 3:-
Name this operation and configure operation with below options
- Operation Type :- Get
- Object : Names
- Input Type : Single Json Object
Configure simple Json profile with 2 fields for first name and last name.
- Output Type : Single Json Object
Configure simple Json profile with 1 field for Full Name.

Step 4:-
Click the “+” next to Request Profile. Configure as below.
- Since we are working with Json, this should be simple to configure.
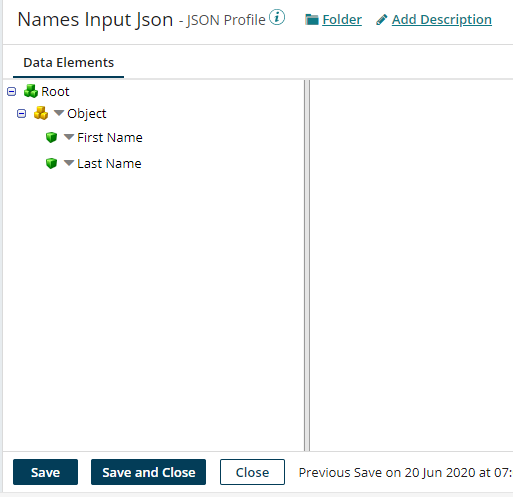
- Name the Json Profile “Names Input Json”.
- Click the dropdown arrow for that element, and create two Child elements, naming one “First Name” and the other “Last Name”.
- Save and Close the profile.
Step 5:-
Click the “+” next to Response Profile. Configure as below.
- Since we are working with Json, this should be simple to configure.
- Name the Json Profile “Final Name Profile”.
- Click the dropdown arrow for that element, and create One Child elements, naming as “Full Name”
- Save and Close the profile.

Step 6:-
Now save and close the web service operation.

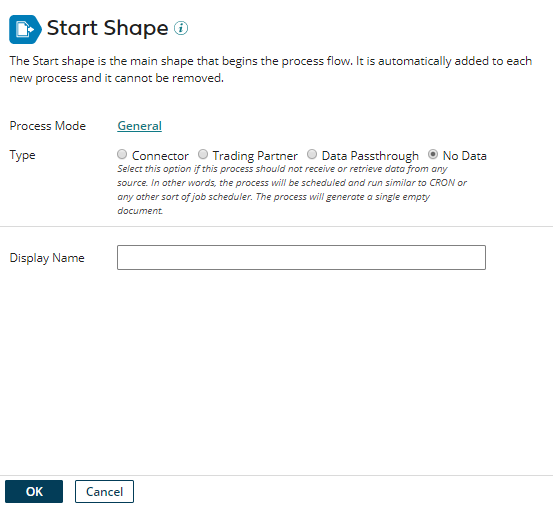
Step 7:-
On the Start Shape screen, click OK.
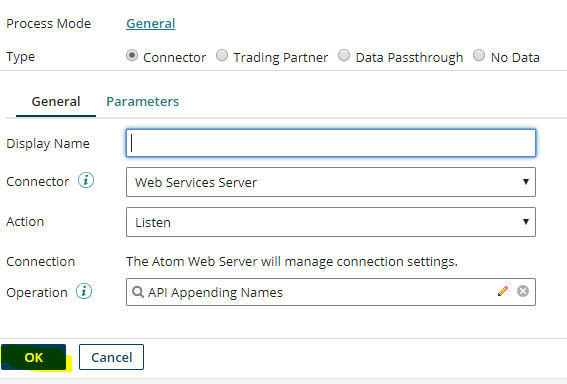
Step 8 :-
- Name our Process “API Appending Names”.
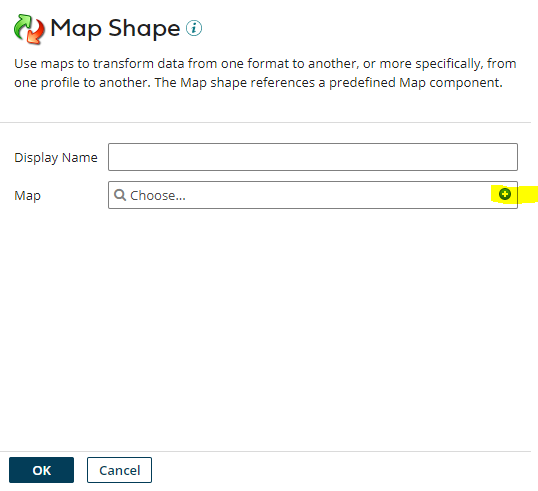
- We have our Listener Shape configured, but we’ll now have to manipulate the data, and provide a result.
- Drag a Map shape to the canvas. You’ll now need to create a Map, by clicking the “+”, within Map Properties.
Step:- 9
In the new Map window, name the Map “Names Append Map”.
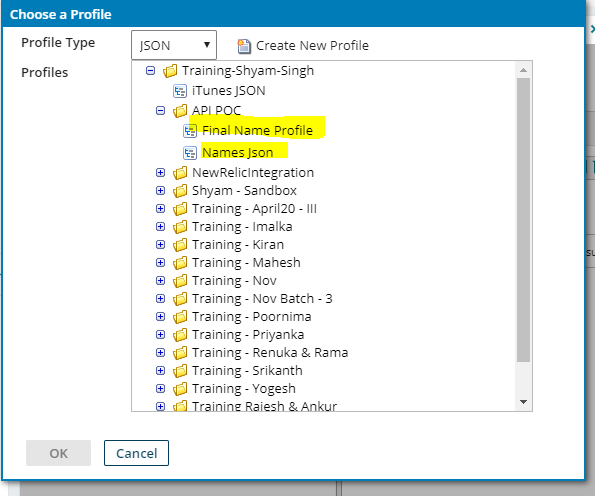
- In the left box (input), click the Choose icon, change the Profile Type to XML, select your Input Json profile and click OK.
- In the right box (output), click the Load icon, change the Profile Type to XML, select your Output Json profile and click OK.
Step 10:-
- Map is configured with both input and output profiles defined.
- Click the “+” in the center box (Functions), and select String Category.
- Select Concatenation, added two inputs by clicking “+” and give delimiter as space then click OK.
- We can see two inputs, a function, and an output in the map.
- Drag the inputs ‘First Name’ to the function Value, and the inputs ‘Last Name’ to the function Concatenation.
- From the function, drag Result to the outputs ‘Full Name”.
- Click Save and Close, then click OK on the Map Properties screen

Step :- 11
- Attach the Start Shape (Web Services Server Connection) to the Map shape you just configured.
- The listener connector and data processing steps are defined. We now need to push the results back as the response to the API call.
- Drag a Return Documents shape to the canvas, click OK on the Return Document Properties screen, and attach the Mapshape to it.
- Now save & close the process.

Step 12:-
API component configuration
- From the Welcome tab, click API. In the new window, name the API “Concatenation API”. Then click Save in the bottom left.
- There are two configuration options available on this tab
- Base API Path: This is used to append to the REST URL Path This is particularly helpful when creating new versions of the API, while keeping old ones in place.
- HTTP Headers: This is an optional setting which allows you to specify the following: Accept, Accept-Charset, Accept-Encoding, or Accept-Language.
- Name the Base API path as “Name”.
- Click on the “Rest”
- Within the API Component we created in Step 1, click the Import an Endpoint button in the top right.

- In the next window, select Use an existing process, and click Next.
- Locate the “API Appending Names” we created using the Magnifying option, and check the boxes next to REST.
- Click Finish.


- Now Navigate to the Rest tab.
- The imported Endpoints will be visible in the REST tab. Click on the settings wheel below Actions and select edit endpoint. You will see the following:
- General Settings
- Process: Which process (listener) this will kick off, and pass the input data to.
- URL Path: You can specify a specific path after “Names”, which will redirect to a different listener. For example:
- {Name}, can be configured twice and accept more than one input/output type (XML, json, etc.), based on the HTTP Header value passed through.
- HTTP Method
- Input Type/Output Type
- Request/Response Profile
- HTTP Headers
- Change the HTTP Method to POST.

- For the API Component to work, we’ll need to configure the atom’s Shared Web Server Settings.
- Under Atom Management, select the Atom we are going to deploy the API Component and Listener Processes to.
- Click the Shared Web Server Settings option.
- Under the Authentication Tab, select BASIC for the Authentication.

- Under the User Management Tab, select the User under Users, and click Generate, to generate an access token. Check Show, so you can see what it is. Then click OK to save the configuration.

Deployment of API Component & Listener Processes
- API Component and Listener Processes to work, we need to deploy them.
- Navigate to the deploy tab.
- Create a packaged component & select the process and API component from the left.

- Click on the Next Add details.

- Now click on the package component and deploy the package.
- We have successfully created and deployed the process.
Testing of API
- We can test API by using external tools like postman, SoapUI.
- From Boomi also we can do testing by using Http client.
- Create a process with selecting start shape as No data.
- Now drag the connector component and select the Http client use the action get.
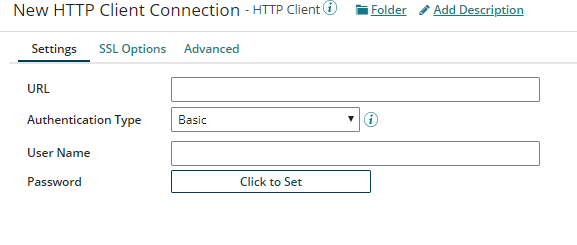
Configure the new http client connection and provide the below details.
URL :- Get this from Atom management page(Shared web server => BaseURLpath)
Authentication Type:- Basic
User name:- (Shared web server =>Usermanagement=>username)
Password:- (Shared web server =>Usermanagement=>Password)
- Now configure the Http operation by providing the details like request profile, response profile, content type, Http method.

- Leave the Headers section blank. You would use this if you defined any within your API Component.
- In the resource path section, we need to provide base url path from the API component which we have configured above.
- In the message shape, our payload needs to be defined as your request. In our case, you’ll want to enter the following:
‘{
“First Name” : “Charan”,
“Last Name” : “V”
}’

Input:-

Output:-
